When using Cloud Run we can send queries to the internet but by default the IP address will be dynamic. However when querying external services (egress) such as third-party providers or services hosted outside of our Google Cloud project we often need a fix IP address that we can white-list (instead of leaving the traffic open to the whole internet).
How do we change this ? We can use a Serverless VPC Access Connector and Cloud NAT (Network Address Translation). The good news is that it is simple and quick (less than 15 minutes if you do it via the web console) to do.
Outline
First we configure a Serverless VPC Access Connector to route traffic from Cloud Run (*) into our VPC. This makes sure our outbound traffic can enter the VPC network.
Second we reserve a fixed public IP adress in Google Cloud.
Next we create a Cloud NAT. Once inside the VPC, outbound requests from Cloud Run will pass through Cloud NAT where the private IP addresses are translated to the static public IP address (that we assigned to the NAT as part of the configutation).
Finally we configure our Cloud Run service to send its egress traffic via the Serverless VPC Access Connector.
Once this is done you can white-list the fixed IP address on the external service.
Remark (*) We use Cloud Run as an example but this applies to other GC services.
Regional setup
It is import to note that while the VPC is global our services (eg Cloud Run in this example) are deployed by region and that the Connector and the NAT setup are also regional.
For this reason we are using the pattern “{name_of_vpc=default}-{region}” when naming the resources we are configuring in each region we are deploying too.
Configuring the Serverless VPC Access Connector
Via GC web console go to the VPC page and select “serverless vpc access” from the left menu
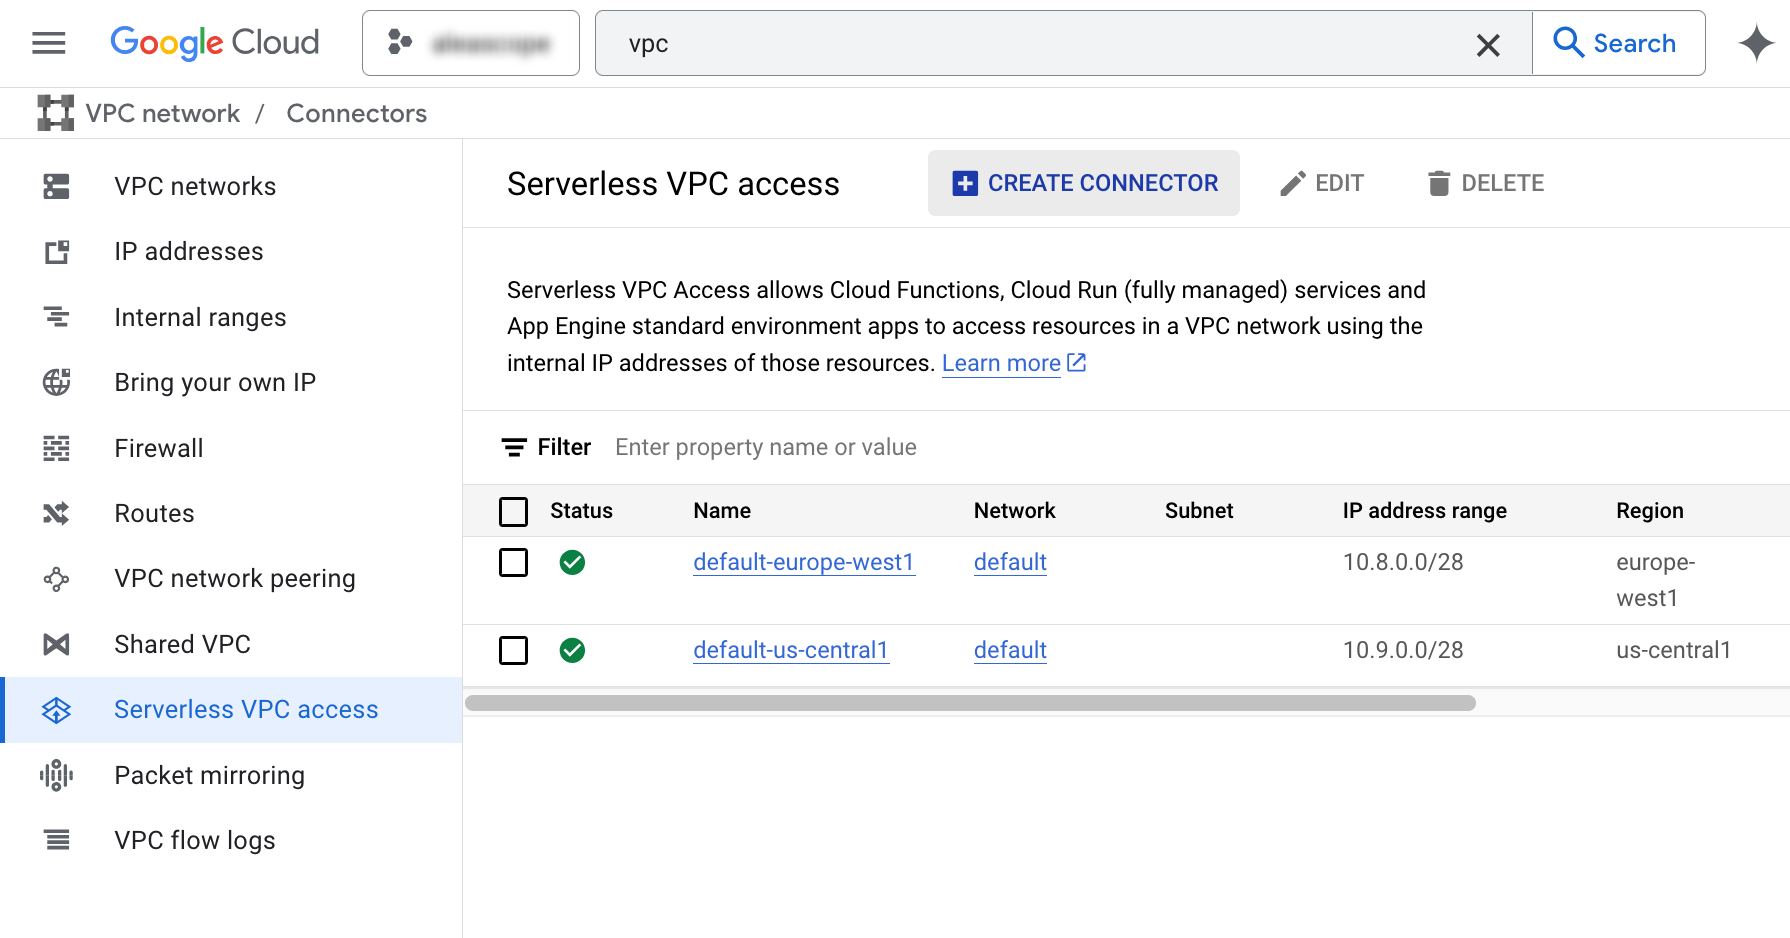
Then click “create” at the top of the middle panel
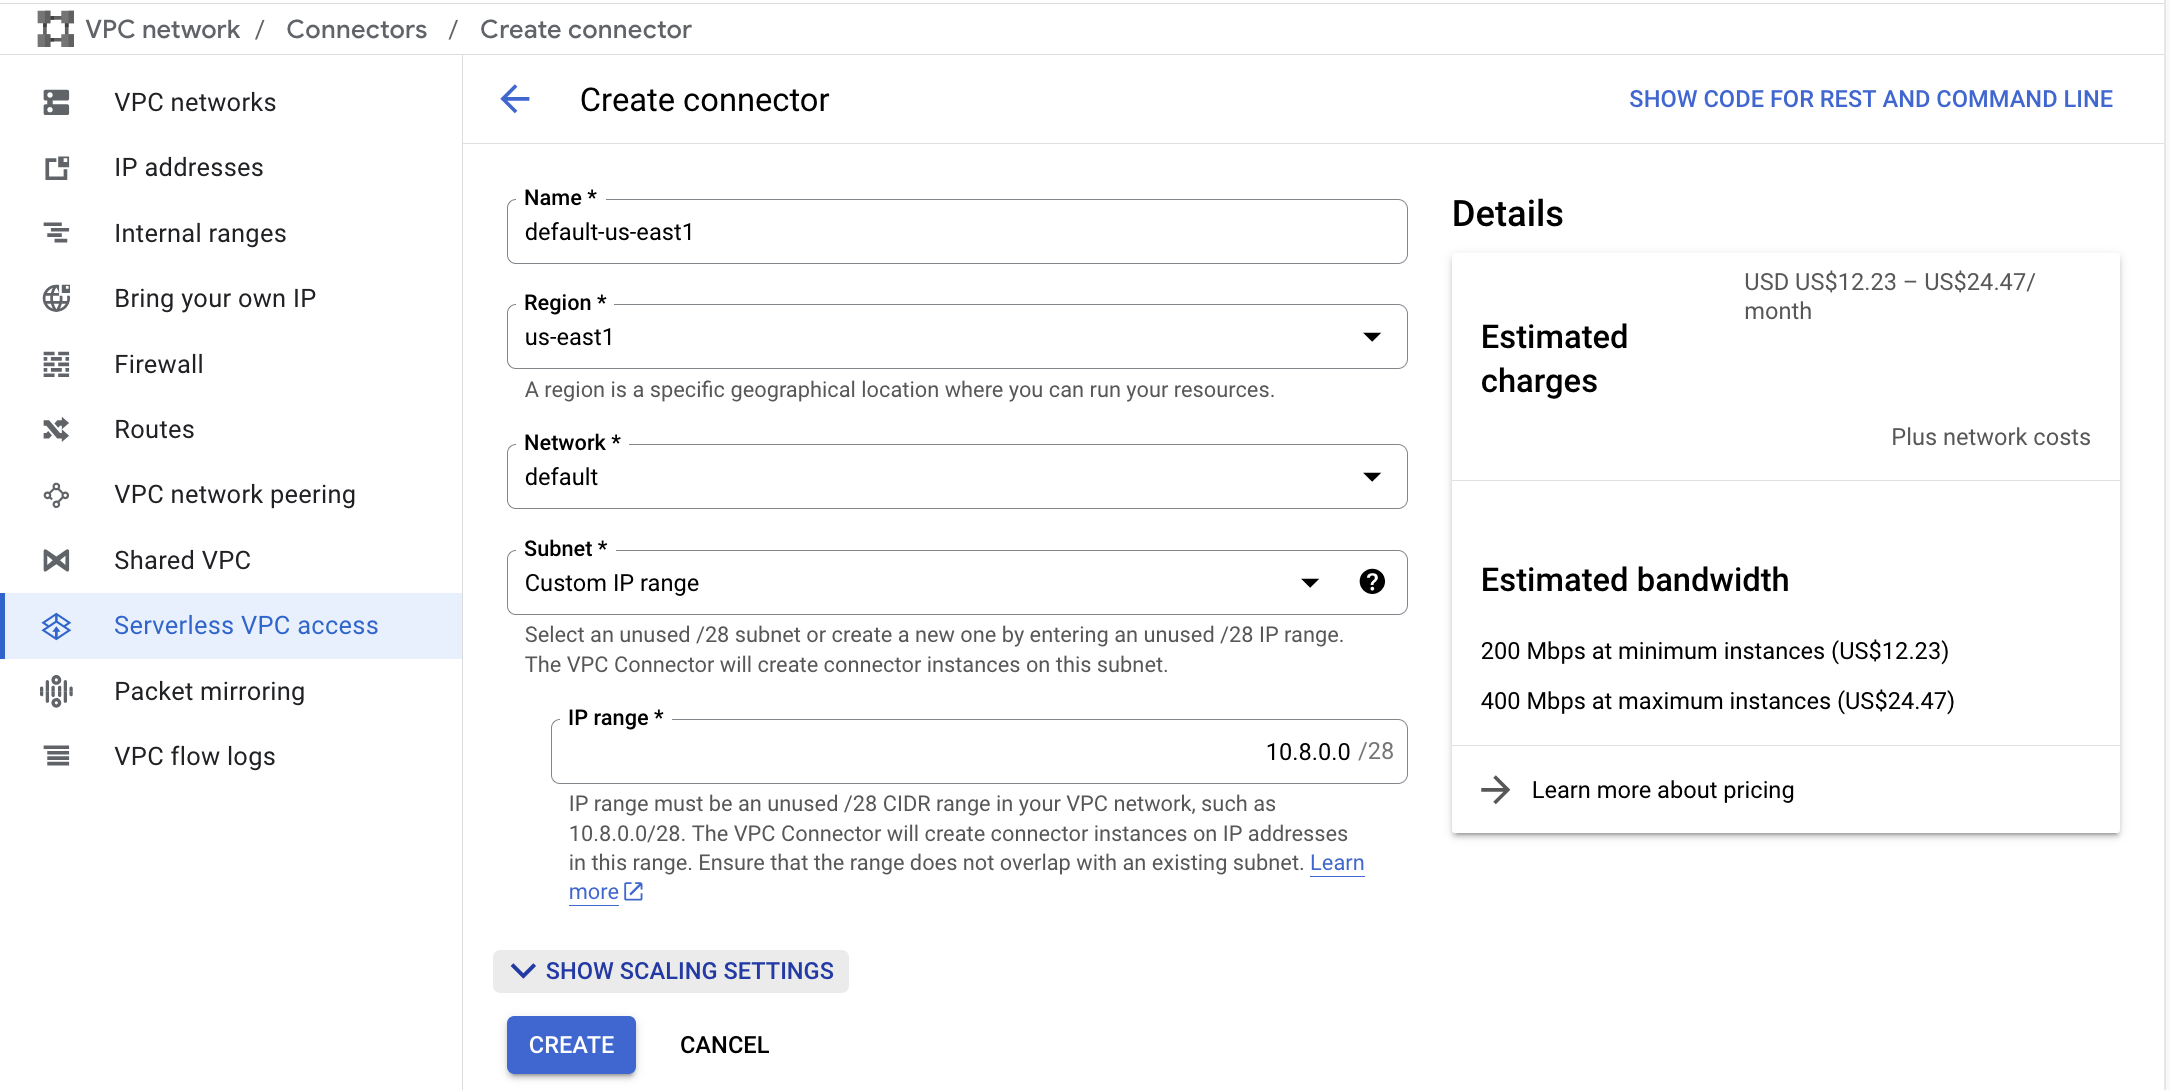
Select the region you want to set your Connectors (us-east1) for and its VPC (default) and name the connector according to the “{name_of_vp}-{region}” pattern. For the subnet select custom range and enter the suggested CIDR range if it is available.
Optionally you may want to open the “scaling settings” to lower the max number of instances and reduce the maximum cost especially if you are experimenting. For example here I selected 4 max instances instead of the default 10.
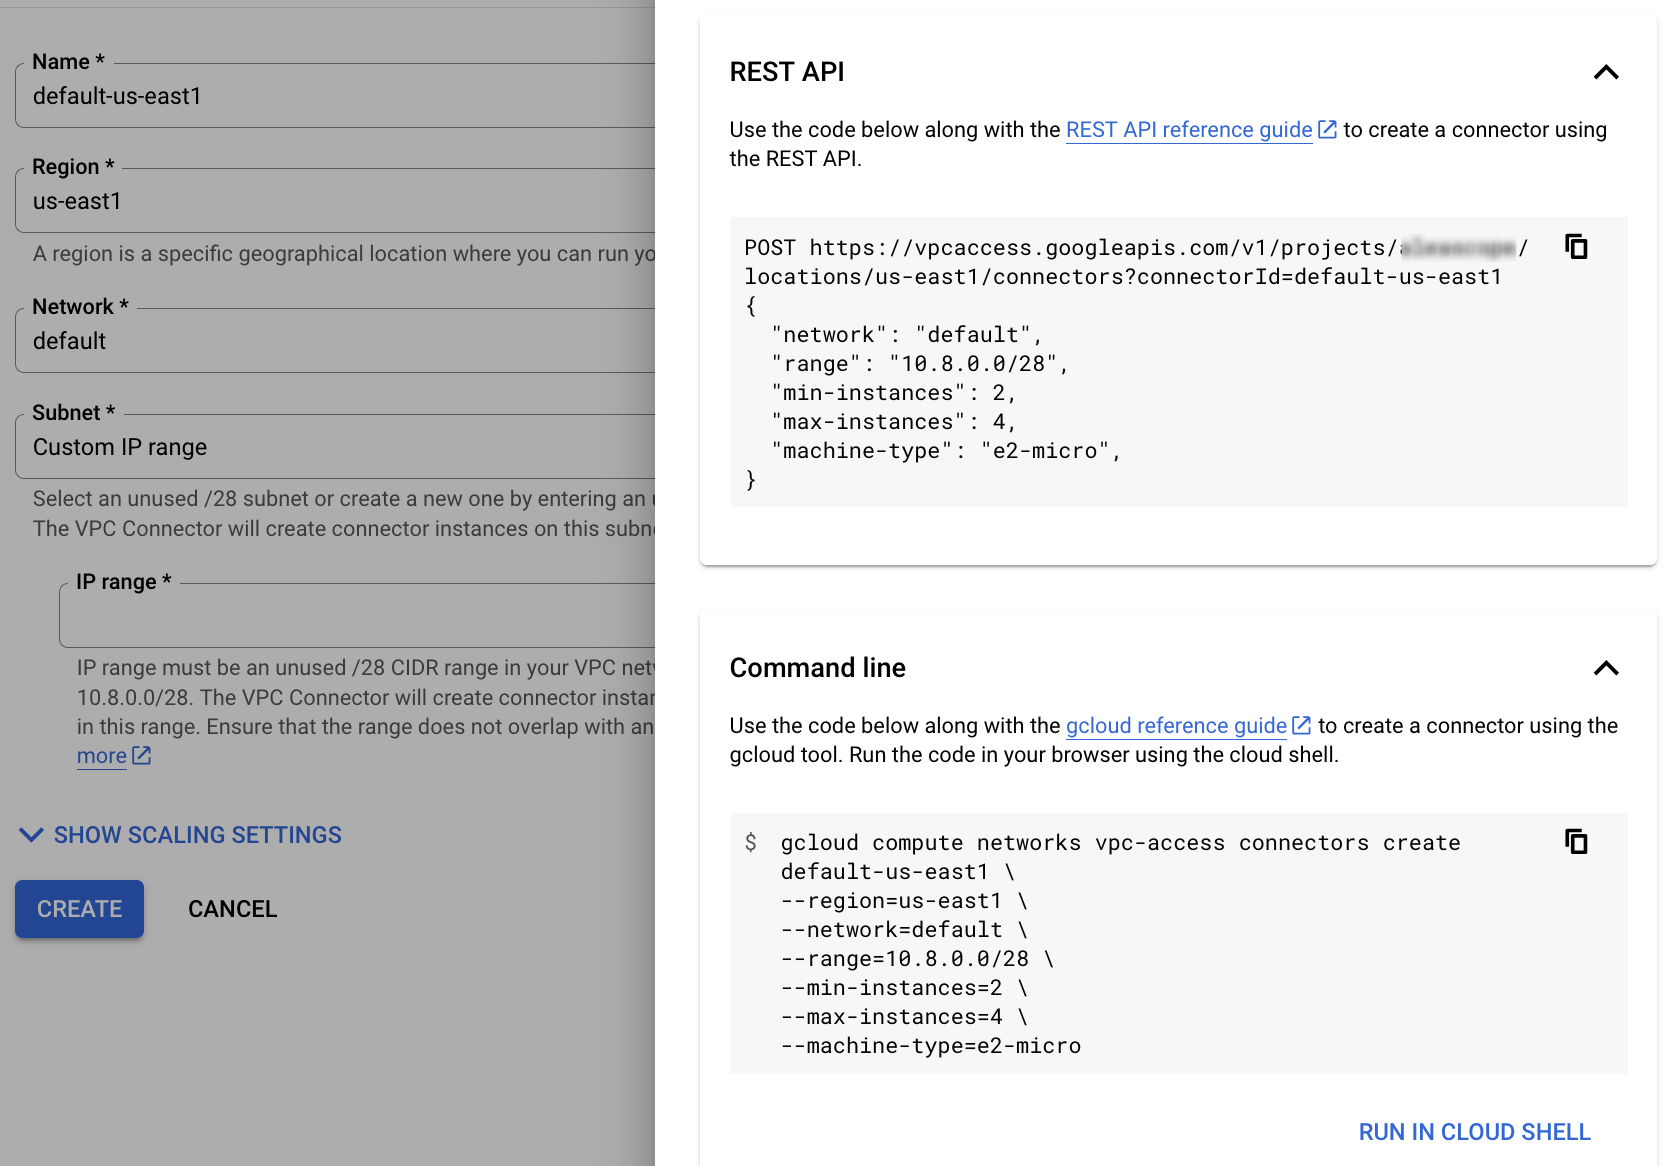
If you need to repeat and tweak this later and you want to automate it note there is a convenient “show code” button at the top right corner which gives you the relevant gcloud commands.
Reserving a dedicated IP address
The quickest way here is via the command line:
gcloud compute addresses create default-us-east1 --region=us-east1
Created [https://www.googleapis.com/compute/v1/projects/<YOUR_PROJECT_ID>/regions/us-east1/addresses/default-us-east1].
Note that a public IP adress is not specific to a given VPC, yet given we intend to use it to setup a NAT that itself is specific to the VPC we keep our naming pattern “{name_of_vpc}-{region}”.
To print the actual address use:
gcloud compute addresses describe default-us-east1 --region=us-east1 --format="value(address)"
34.74.466.721
This will be usefull to white-list it on the external service side !
Configuring the NAT (and its Router)
Via the web console open “network services” and select “Cloud NAT” in the left side menu. Then click on “create” at the top of the middle panel and you will get a page like this:
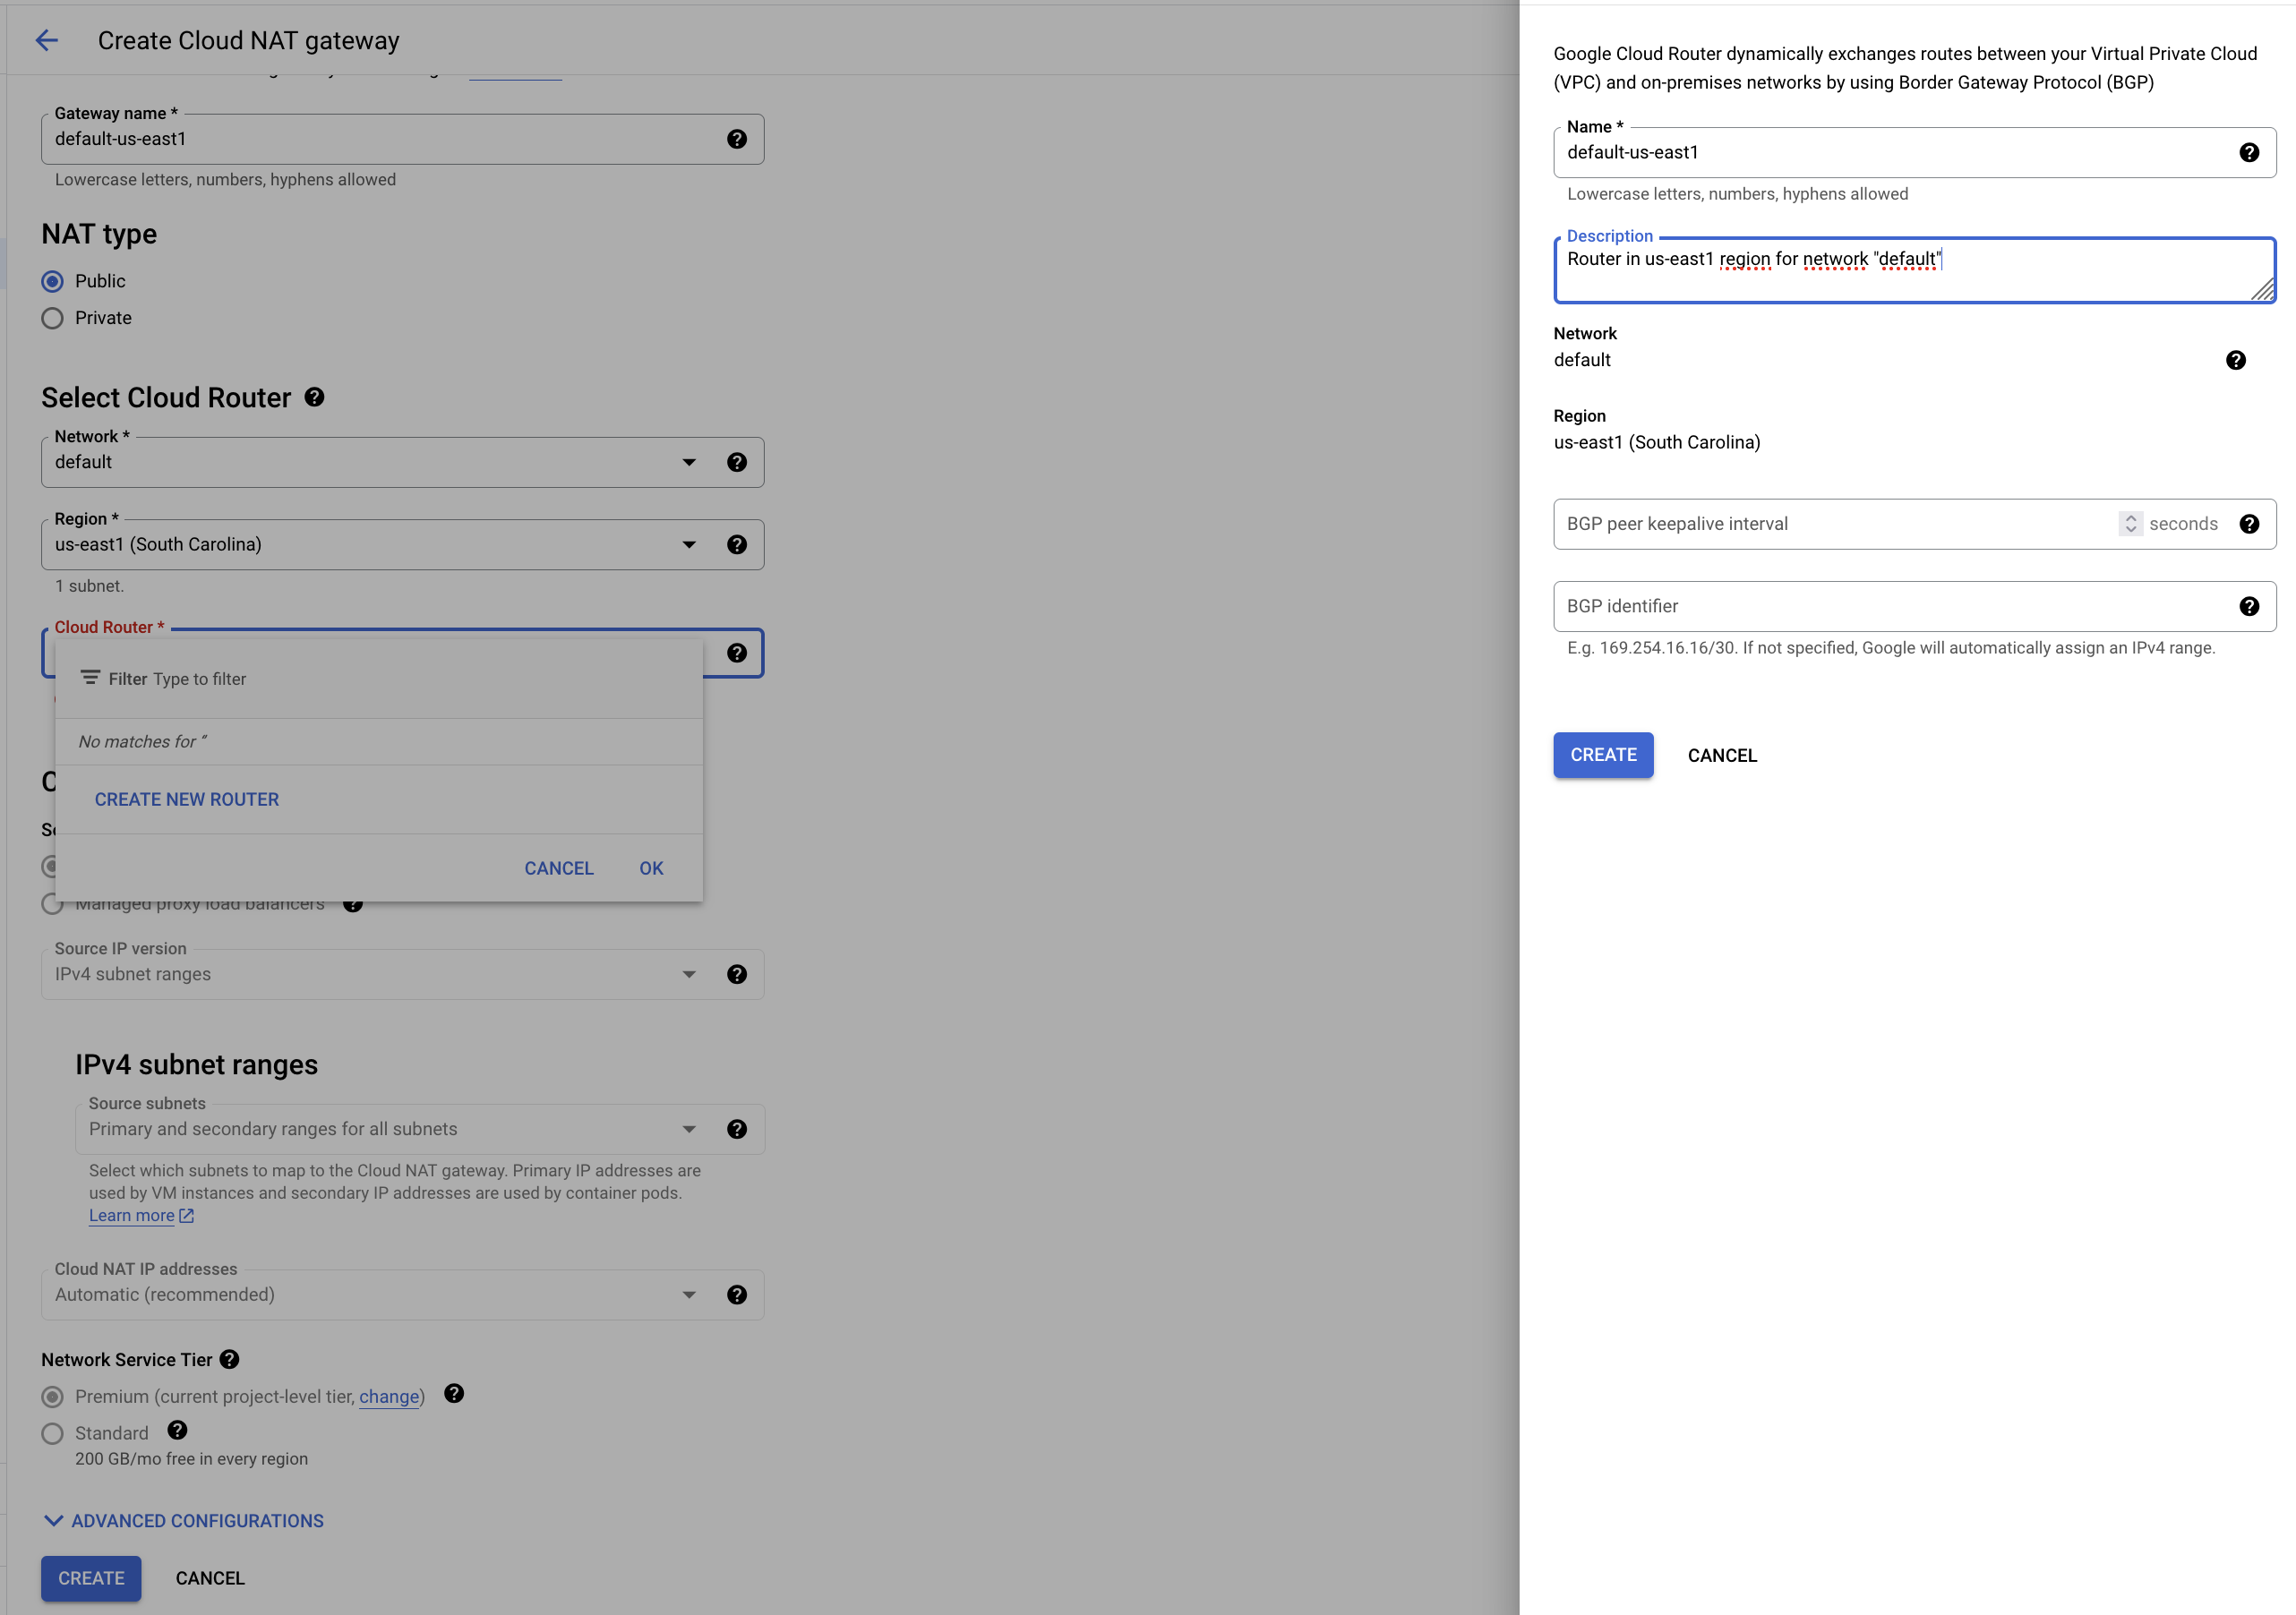
Select a region and name the NAT again using the pattern “{name_of_vpc}-{region}”. Select a “public” NAT as we need to reach to an external service.
We also need to create a Router but this can be done from the same form. Select “create new router” in the dropdown of the Router field to open a dedicated form to the right. Once the Router creation is confirmed you can proceed with the “create” button at the bottom of the main form.
Annotating Cloud Run with the Connector
Most likely you are deploying your Cloud Run application with a yaml file. To direct the egress through the NAT we configured with the fixed IP address you need to add the following annotations to your yaml file:
spec:
  template:
    metadata:
      annotations:
        # add these annotations to direct egress through the NAT with the fixed IP address
        run.googleapis.com/vpc-access-connector: 'default-us-east1'
        run.googleapis.com/vpc-access-egress: 'all'
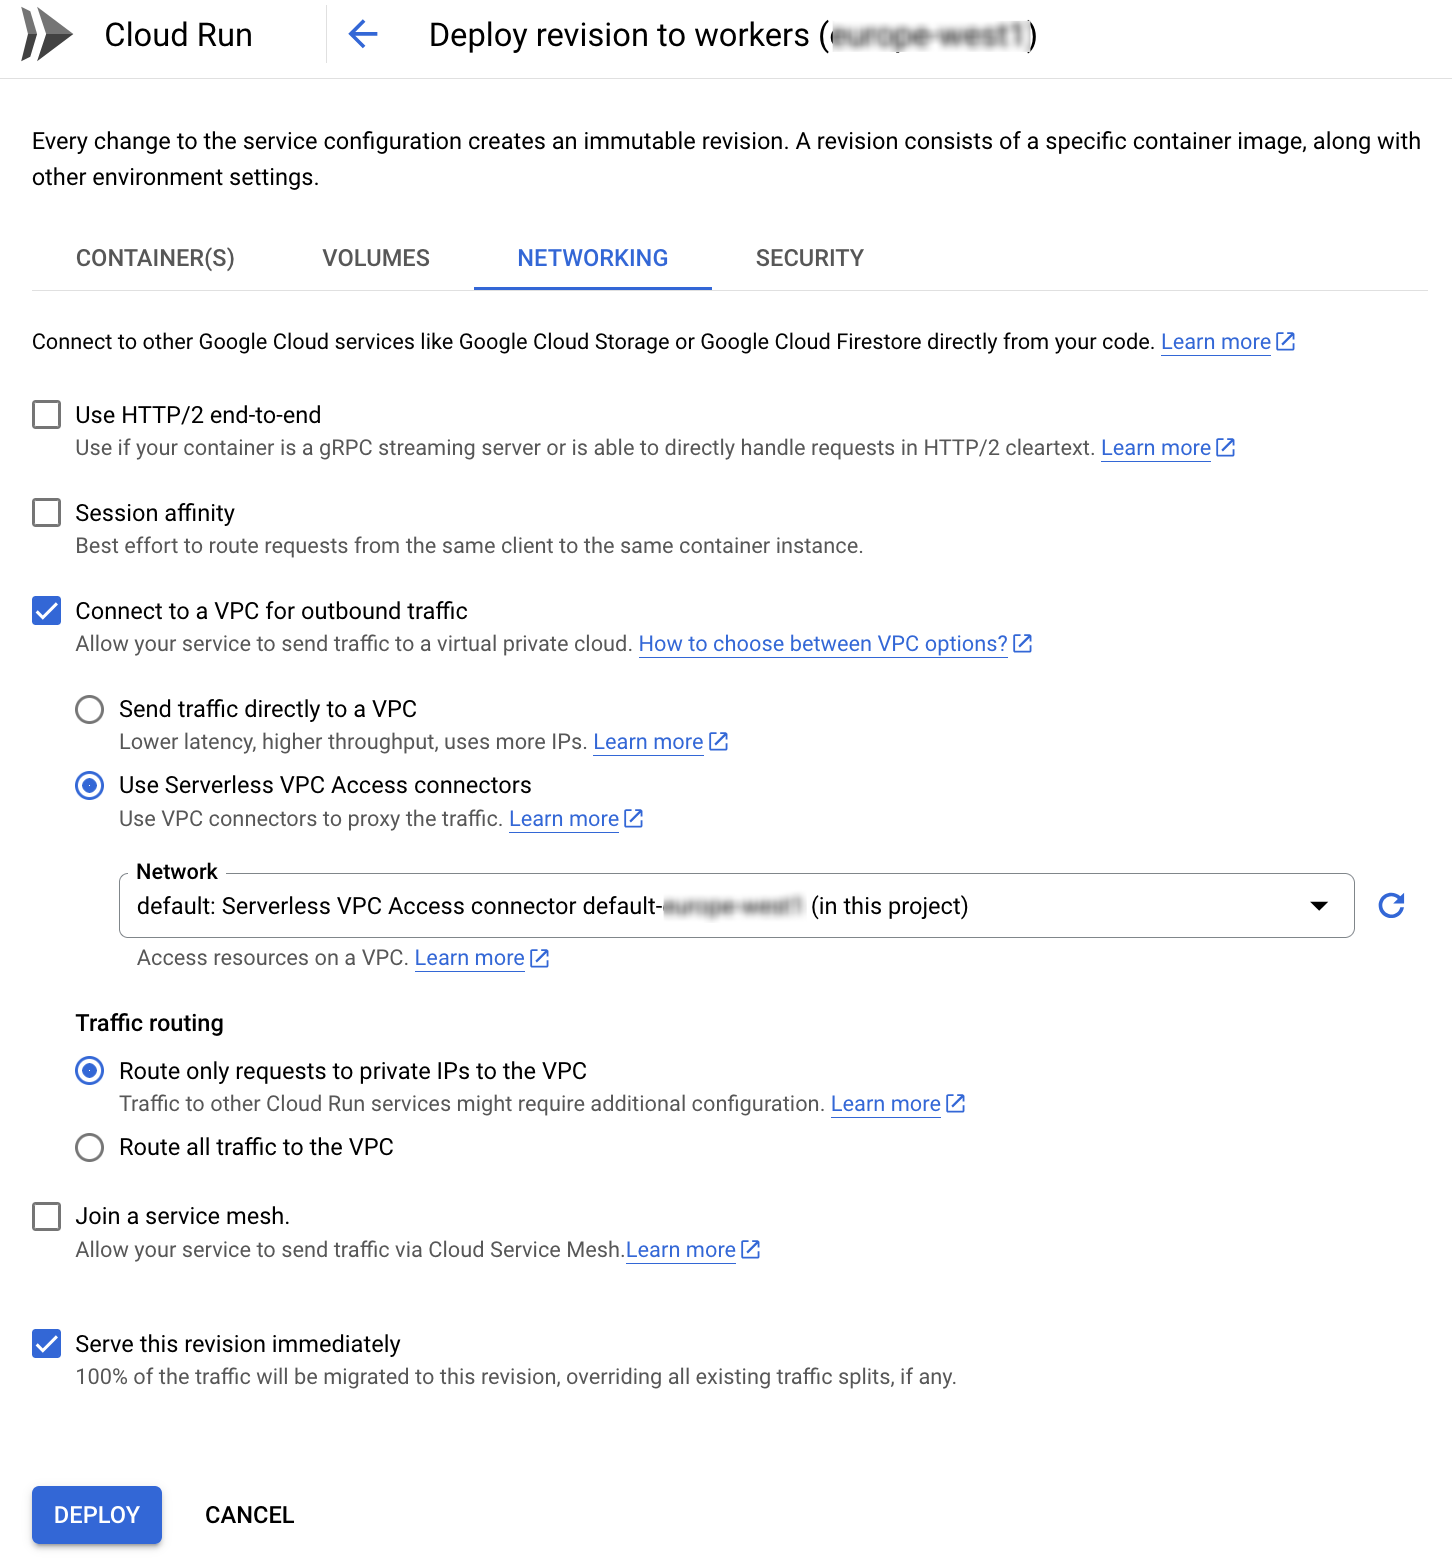
After you re-deployed the app with this change if you inspect the app via the web console you will see this under the networking section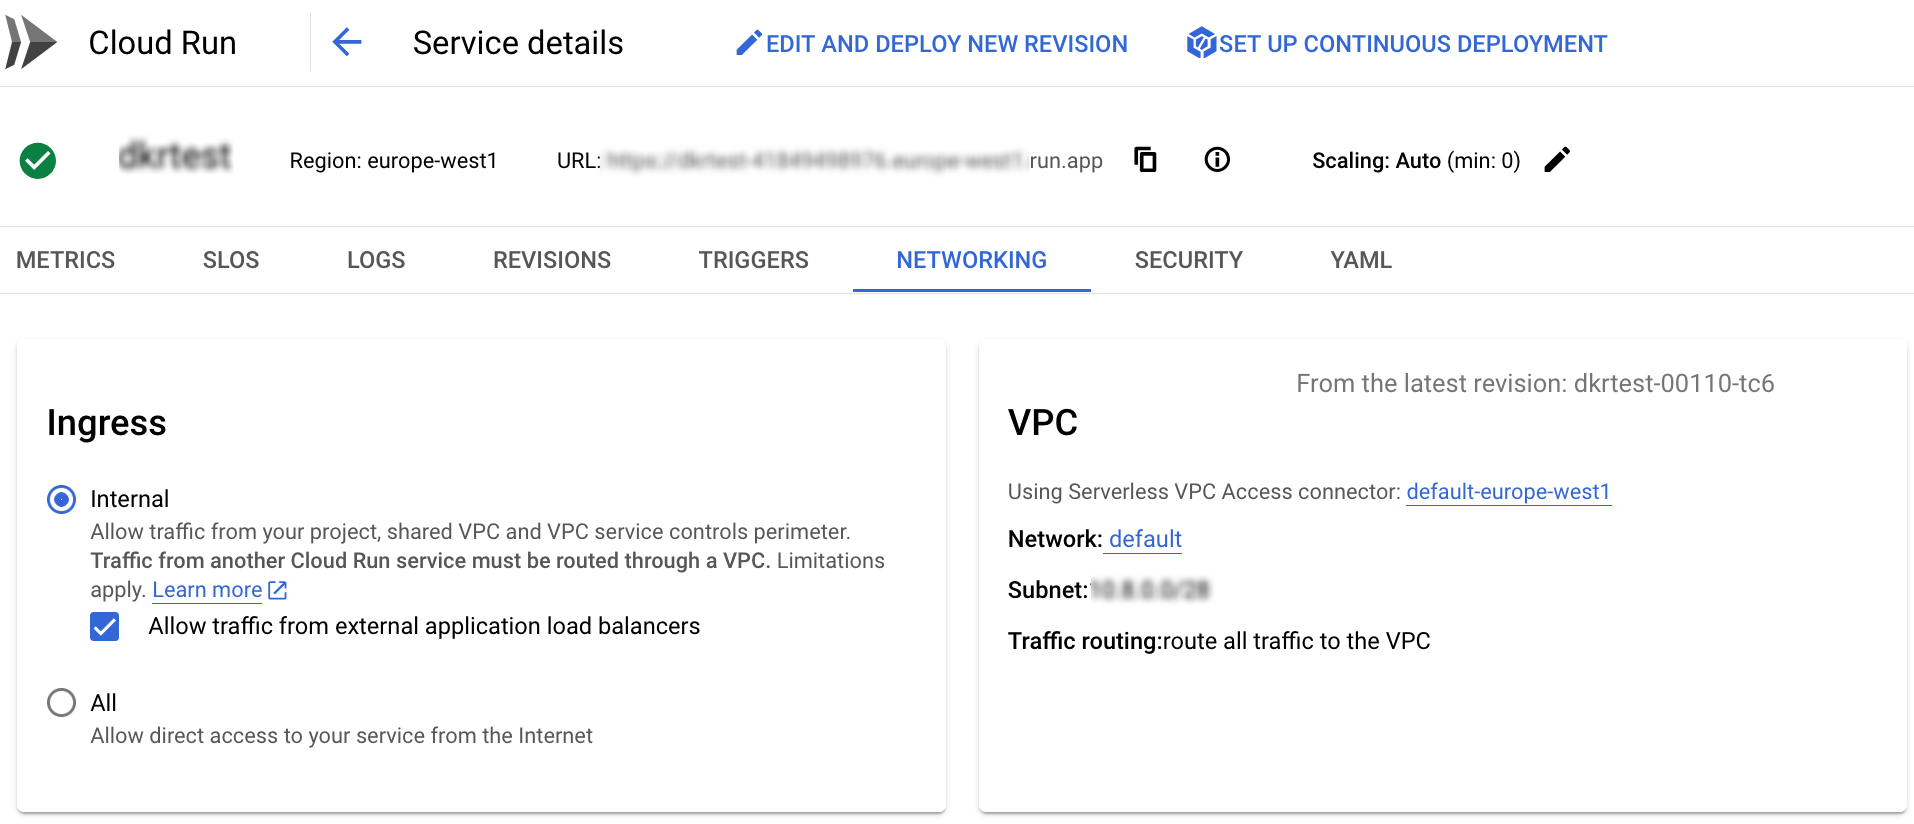
Alternatively if you want to run some quick testing by editing the app via the web console directly you can do it as follow: